Proper Surface Preparation for Concrete Slabs
Understanding Concrete Surface Profile (CSP)
A major consideration of proper concrete surface preparation is to achieve the desired concrete surface profile.
CSP represents the measure of surface roughness. Different CSP levels, typically rated from 1 to 9, directly affect how well subsequent coatings and overlays bond to the surface. You can identify the required CSP level based on the thickness and type of the overlay or coating applied. For instance, a thin-film coating often needs a CSP level in the range from 2 to 3, while a thicker overlay might need a level of 5 or more to ensure proper adhesion with your concrete slab.
- CSP 1-3: Lightweight coatings
- CSP 4-6: Sealing overlays
- CSP 7-10: High-build coatings or overlays
Significance of Surface Profile for Coatings
The surface profile directly impacts the life of applied coatings. A well-prepared surface promotes strong adhesion, reducing the likelihood of coating failure. Coatings, whether for protection or even just plain old aesthetics, demand a suitable surface profile to adhere and perform as expected.
Coatings have required CSP levels. You’ll want to make sure that you have prepared the slab in a way that matches your coating’s requirements to secure bond strength and durability. Placing a coating on a surface profile that doesn’t meet these requirements will result in poor adhesion and shortened lifespan of the floor coating.
Assessment and Inspection Procedures
While this video is specific to wastewater treatment, many of the same principles apply when it comes to assessing the concrete. You’ll want to look for missing pieces, existing coatings, exposed aggregate and signs of decay or even corrosion in your slab.
Surface prep also involves the proper assessment and inspection are crucial when preparing concrete surfaces. These procedures ensure the concrete substrate is ready for further treatment or concrete repair.
Determining Surface Soundness
You must assess concrete’s surface soundness before any repair work begins. Visual inspection can in some cases easily identify the big problems and surface defects that you may have with your concrete slab. A rudimentary way to test this is by performing a tap test with a rebound hammer. You can do this in a few different sections of the concrete. If the hammer is able to deform the concrete surface, you’ll know that particular section of concrete isn’t “sound”.
You can also gauge the current surface profile of the concrete with International Concrete Repair Institute (ICRI) rubber comparators. These will give you an idea of the current soundness of the concrete and let you know how your slab compares to the coating that you wish to apply.
Identifying Surface Contaminants
In addition to the general soundness of your concrete slab, you’ll want to take an in depth look at the surface. Inspect the surface for oil, grease, dirt, and curing compounds that may hinder adhesion. For precision, conduct adhesion testing after cleaning the surface. Ensure you remove all contaminants to achieve the best results in repair or coating applications.
Evaluating Concrete Cracks and Damage
Examine the surface for cracks to understand their extent and cause. Measure crack widths using appropriate tools (like concrete crack comparator cards) and compare them to ICRI guidelines. Document the location and size of damages and evaluate the substrate’s stability. This information will guide you in selecting suitable repair materials and methods.

A severely damaged concrete floor may require removal or at the very least repair depending on the extent of the damage
Preparation Techniques
Effective concrete surface preparation ensures proper adhesion, durability, and longevity of subsequent applications. Different techniques satisfy various project needs based on the condition of your concrete surface and the desired final result.
Mechanical Surface Preparation
Mechanical surface prep methods like grinding and scarifying prepare concrete surfaces by removing layers and creating texture. The surface preparation method is in part determined by the amount of concrete that you need to remove from the surface.
Concrete Grinders
A concrete grinder is a tool used in concrete surface preparation to smooth and finish concrete surfaces. Concrete grinding employs rotating abrasive discs to smooth or level concrete, and is ideal for removing minor flaws or coatings. These discs are embedded with abrasive particles, such as diamond or silicon carbide, to grind down the surface of the concrete.
When the concrete grinder is turned on, the rotating discs apply a frictional force to the concrete surface. This abrasive action removes the top layer of the concrete, smoothing out any roughness and leveling any uneven areas.
The degree of smoothness can be controlled by the grit size of the abrasive material on the discs; finer grits lead to a smoother finish, while coarse grits are used for more aggressive grinding and removal of material.
Concrete grinders come in various sizes and styles. Small hand held grinders can be used for tight spaces like stairs. Most of the grinders you’ll see on a job site are large walk-behind machines. They must be equipped with vacuum systems to collect dust and debris, making the grinding process cleaner and reducing airborne particles.
The grinding process may require several passes with the machine, using progressively finer grits until the desired surface finish is achieved.
Concrete grinders are ideal for CSP levels of 2-8.
Also note that concrete grinders play a pivotal role in concrete polishing. Finer and finer grits are applied to the floor along with chemical hardeners in order to achieve that extremely dense, durable and reflective polished concrete surface.
Concrete Scarifiers
If you need to modify a thicker layer of concrete, utilizing a scarifier for surface prep may be your best bet. Scarifying involves equipment with cutting wheels that cut the concrete, effective for removing thicker layers and for surface leveling when more extensive material removal is necessary.
Different From Concrete Grinders
Both grinders and scarifiers each have their role when it comes to surface preparation. Think of grinders as the scalpel and scarifiers as the hammer.
Scarifiers are extremely powerful and are capable of removing thicker layers of concrete than grinders and can be used to remove tough materials like epoxy coatings, road markings, and heavy-duty floor tiles. Also unlike concrete grinders, which use rotating discs, scarifiers use a drum embedded with steel or carbide-tipped cutters, also known as flails, to chip away at the concrete surface.
When the machine is powered on, the drum rotates at a high speed, and the cutters impact the concrete surface, breaking and removing a layer of the concrete. This process creates a rough, textured surface, which is ideal for applications where a new layer of material, such as an overlay or coating, needs to be applied, as it allows for better coating adhesion.
As with grinders, you’ll want to make sure you have proper dust collection when using a scarifier.
With scarifying, you’re roughing up the concrete to a CSP level of four or higher.
A good overview of grinders, scarifiers, and controlling dust in your workspace during the surface preparation process
Shot Blasters
A shot blaster is a surface preparation tool that uses high-velocity steel shot or grit to clean and texture concrete and metal surfaces. The machine works on the principle of centrifugal force. Small metal beads are repeatedly “shot” at the surface. This abrasive blasting method is highly effective for removing coatings, paint, and other contaminants. The result is a roughened surface profile for better adhesion of new coatings.
The shot blasting process involves the following steps:
Loading the Abrasive: Steel shot or grit is loaded into the machine’s blasting wheel.
Acceleration: The machine’s wheel rapidly spins, using centrifugal force to accelerate the shot or grit and hurl it against the surface being prepared.
Impact and Cleaning: As the abrasive media strikes the surface, it blasts away contaminants, coatings, and creates micro-indentations in the concrete, resulting in a clean and textured surface.
Recycling the Abrasive: The spent shot, along with the removed debris, falls into a recovery system where it is separated. The shot is cleaned and recycled back into the wheel for continuous use.
Dust Collection: A dust collector attached to the shot blaster captures airborne dust and particulate matter, keeping the working environment clean and preventing pollution.
Shot blasters come in various sizes, from small, portable units to large, ride-on machines. They are commonly used in industrial flooring, parking garages, bridge decks, and airport runways for surface preparation before the application of sealers, coatings, or markings. The process is quick, efficient, and environmentally friendly, as it does not use chemicals and recycles the blasting media.
Chemical Surface Preparation
Chemical methods like acid etching remove surface contaminants or slight imperfections and help in opening up the concrete’s pores. It involves applying a dilute acid solution, usually muriatic or phosphoric acid, that reacts with the concrete.
You’ll want to apply the acid solution evenly and follow the instructions printed on the solution. The solution will require a certain amount of time to adequately react with the concrete surface. Once the reaction has completed, you’ll be able to neutralize and rinse the surface – again according to instructions on your acid solution.
Cleaning Your Concrete Surface
Before applying any coatings or repairs, you must ensure concrete surfaces are clean and free from contaminants. This allows materials to bond effectively with the concrete surface.
Dust and Debris Removal
You need to remove all loose dust and debris from the concrete surface. Use brushes or brooms for dry cleaning, and consider industrial vacuums for efficient removal of finer particles. Each method ensures that the surface is clean and ready for further treatment.
Oil, Stain, and Sealers Removal
Remove all traces of oil, stains, and existing sealers to avoid bonding issues. Apply suitable cleaning agents and scrub the area thoroughly. For heavy staining, use degreasers or chemical strippers designed for concrete surfaces.
Water Cleaning and Concrete Cleaners
Use water cleaning for general surface dirt. For tougher grime, pressure washing is effective. These methods not only clean but also help to slightly roughen the surface for better adhesion of subsequent layers. Always adjust the pressure to suit the concrete’s condition to prevent damage.
Use of a concrete cleaner can also be highly effective at removing dirt, contaminants and stains and get your slab ready for sealing or staining.
Testing and Verification
Before applying any coating or overlay, you need to verify the prepared concrete surface through various tests. These assessments ensure the surface meets required standards for moisture, tensile strength, and surface profile.
Concrete Moisture Testing
Another essential step of concrete surface prep is moisture testing. To avoid failure of coatings or toppings, check concrete for excess moisture using probes or relative humidity meters. These tools measure the moisture vapor emission rate (MVER) and determine if your concrete is dry enough for the next step. 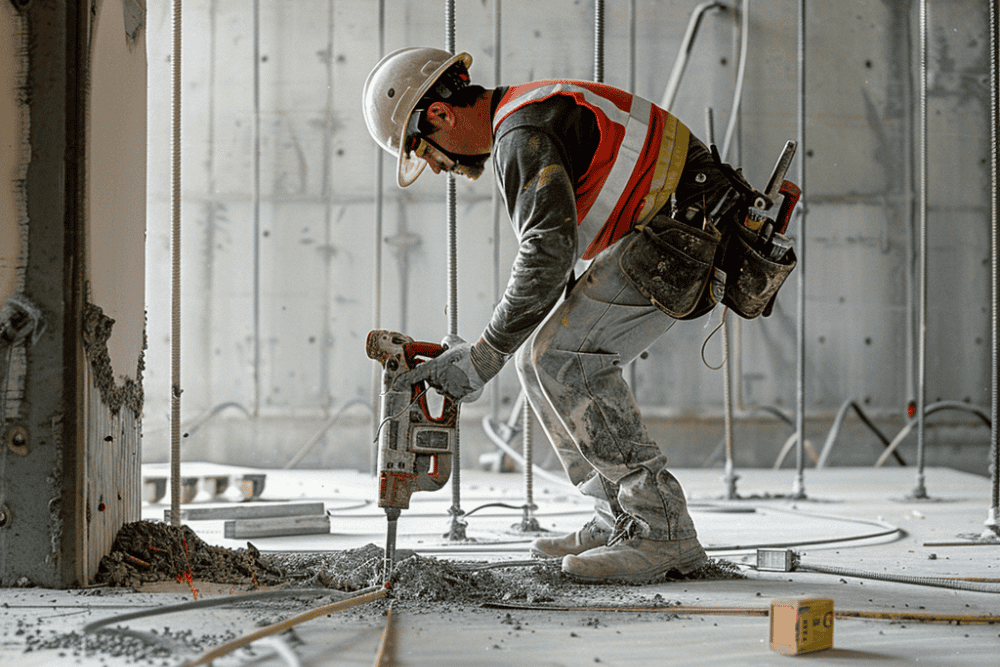
A concrete contractor coring the concrete for moisture mitigation testing to determine if the concrete slab contains excessive moisture
ASTM International sets technical standards for materials like concrete. Use ASTM D 4262-83 to test for surface moisture. This ensures that your substrate is dry, which is crucial for effective adhesion. If your concrete slab has moisture problems, you will likely need to perform concrete moisture mitigation.
Adhesion and Tensile Strength Tests
For bond strength, perform pull-off tests as specified by standards like ASTM D4541. This test determines the greatest perpendicular force a surface area can withstand before a plug of material detaches. High tensile strength indicates a robust bond.
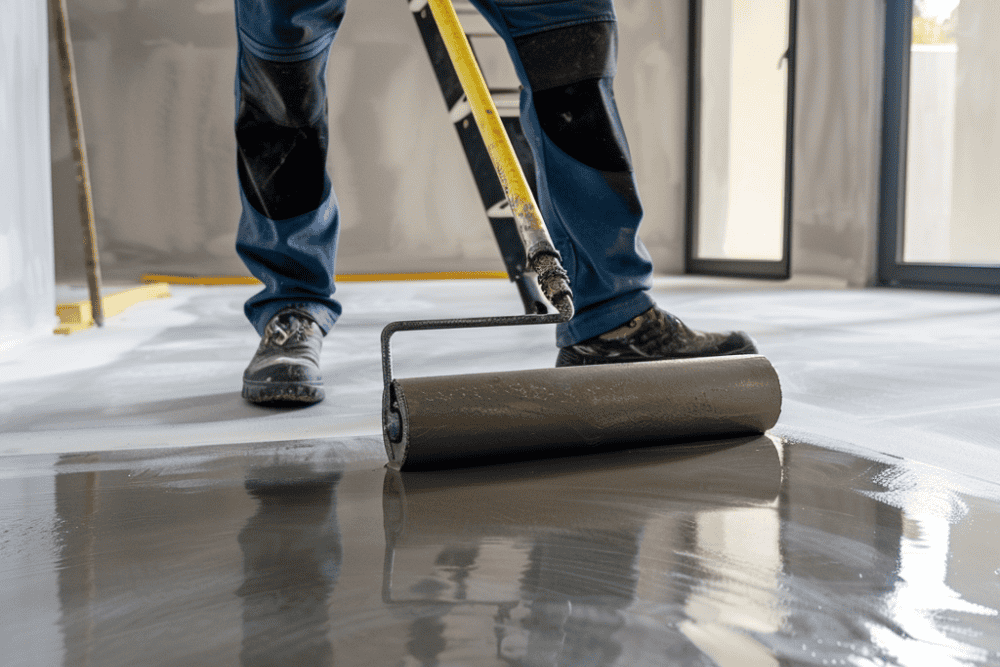
After your slab has gone through proper concrete surface preparation, your concrete coating finally can be applied
Surface Profile Comparisons
Compare your surface profile to ICRI guidelines, employing the Concrete Surface Profile (CSP) schema. This test can be done with the rubber comparators mentioned earlier. This comparison helps ensure the surface texture is adequate for the intended application by measuring the depths of peaks and valleys using visual and tactile methods.